How to Record and Edit Professional Audio on Your Mobile Phone (Step-by-Step Guide)
Hey guys! Welcome back to another tutorial. In today’s post, I’m going to show you how you can record and edit professional-quality voice audio directly on your mobile phone — without needing expensive equipment or complicated software. We’ll go step-by-step through the entire process, including how to record clean audio, remove background noise, enhance clarity, and even which affordable microphone you should use for the best results.
So, if you’ve ever wondered whether you really need a mic, which one to buy, and how to edit your voice like a pro — by the end of this article, you’ll have all your answers. Let’s get started!
Step 1: Preparing Your Room for Clean Audio Recording
Before you hit the record button, it’s important to set up your environment properly. Good audio starts with a quiet space. Follow these simple tips:
- Close all doors and windows: This helps block outside noise like traffic, fans, or street sounds.
- Use soft materials: Place a pillow or cushion in front of your desk or recording area to absorb sound reflections. This prevents echo and gives your voice a smoother tone.
- Minimize background noise: Turn off unnecessary appliances, fans, or air conditioners while recording.
Just following these two or three steps will make a huge difference in how clear and crisp your audio sounds.
Step 2: The Best Way to Record Audio on Mobile
Many people think they need third-party apps to record good audio. But here’s the truth — your phone’s built-in audio recorder is already one of the best tools you can use. Whether you’re using Android or iPhone, the default recorder app captures high-quality sound.
If you’re recording a video, you can even record the audio directly within the camera app — no extra software required. Just open your built-in recorder, tap record, and start speaking clearly at a consistent distance from your phone.
Step 3: Do You Really Need a Microphone?
Now, let’s talk about one of the most common questions — Is buying a microphone necessary?
If you have a budget of around ₹800–₹1000 (about $10–$12), then yes, investing in a good mic is absolutely worth it. I personally recommend the BOYA M1 Mic. It delivers excellent sound clarity for an affordable price and is perfect for mobile creators, podcasters, and YouTubers.
You can easily find the BOYA M1 Microphone on Amazon or other trusted online stores. Make sure you buy from a verified seller to get the original product.
Step 4: Editing Audio Using BandLab (Free App)
Once you’ve recorded your voice, it’s time to edit it professionally. For this, the best free app I’ve found is BandLab. It’s completely free and available on the Google Play Store and App Store.
👉 Download BandLab for Android
After installing BandLab, open the app and tap the “+” button to start a new project. Then select Import File to upload your recorded audio. You can even import audio directly from a video file — BandLab automatically extracts the sound for editing.
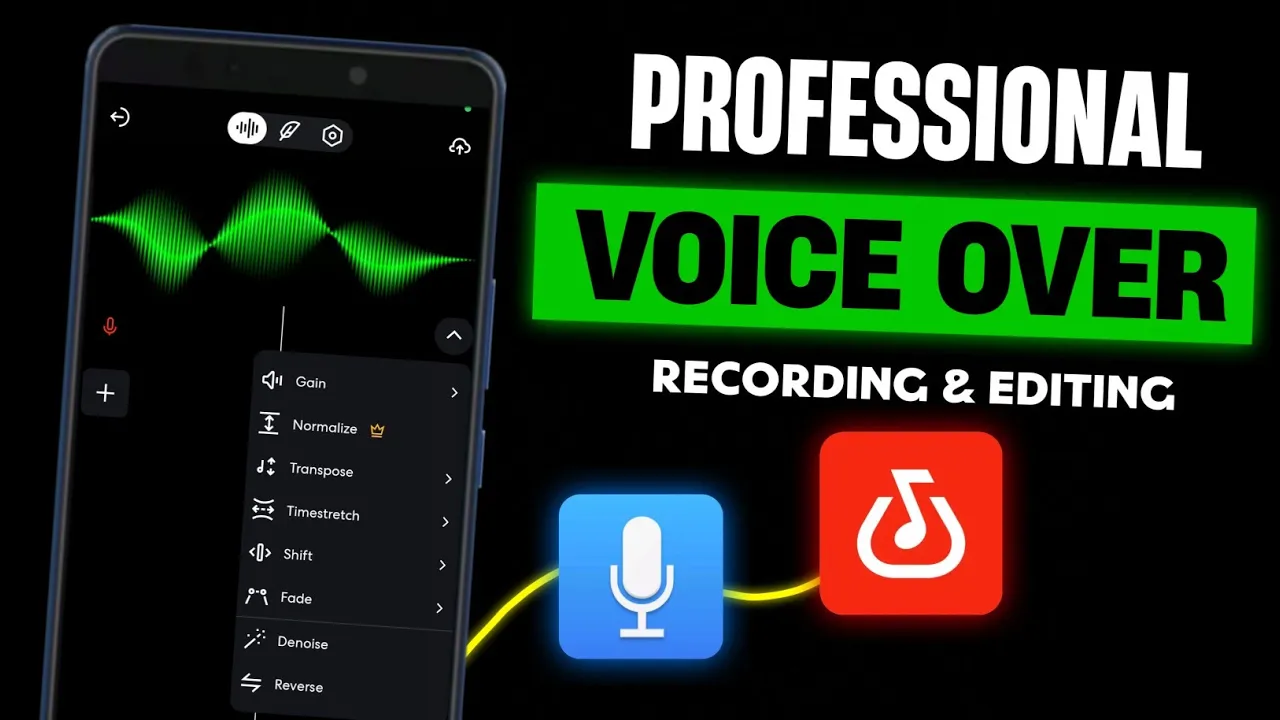
Step 5: Essential Audio Effects in BandLab
To make your voice sound professional, you just need to use a few simple effects. Here’s what to do:
1. Add Noise Gate
Search for “Noise Gate” in the effects section and add it to your track. This reduces background hiss or hum automatically. Adjust the attack and release levels slightly to find a natural tone.
2. Use EQ3 (Equalizer)
This is where the real magic happens. The EQ3 helps balance your voice frequencies:
- Low: Increase slightly for a warm, bass-rich sound.
- High: Raise this a little more than low to enhance clarity.
- Mid: Decrease slightly to add depth and reduce muddiness.
This combination gives your voice a smooth and professional sound.
3. Add Compressor (Optional)
Search for “Compressor” under FX and apply it. It prevents your voice from sounding too loud or “popping.” Set the gain around mid-level for a balanced output.
Once done, click on the De-noise option under settings to remove any remaining background sounds. You can also adjust the overall volume using the Gain control if needed.
Step 6: Save and Export Your Audio
When you’re happy with the results, tap the “Save” button, name your project (for example, “Podcast Intro”), and export it as an audio file. You’ll find your finished recording under the “Projects” section in BandLab. Tap on it, select “Download,” and choose the audio format to save it on your phone.
And that’s it! You’ve just edited your own professional-quality audio right from your mobile device — no computer required.
Final Thoughts
Recording and editing great audio doesn’t require fancy gear. With a quiet room, your phone’s built-in recorder, the BOYA M1 mic, and the BandLab app, you can achieve clear, professional results.
Follow these simple steps, and your next podcast, YouTube video, or voice-over will sound crisp, clean, and ready for the world to hear!
Stay creative, keep learning, and I’ll see you in the next guide. 🎧✨